GPT Image 2 / 2.5 Image Editing API
¶ 1. Obtain an API Key
Open the qiyaov application list, enter an available application, and copy the API Key.

¶ 2. Edit Using an Image URL
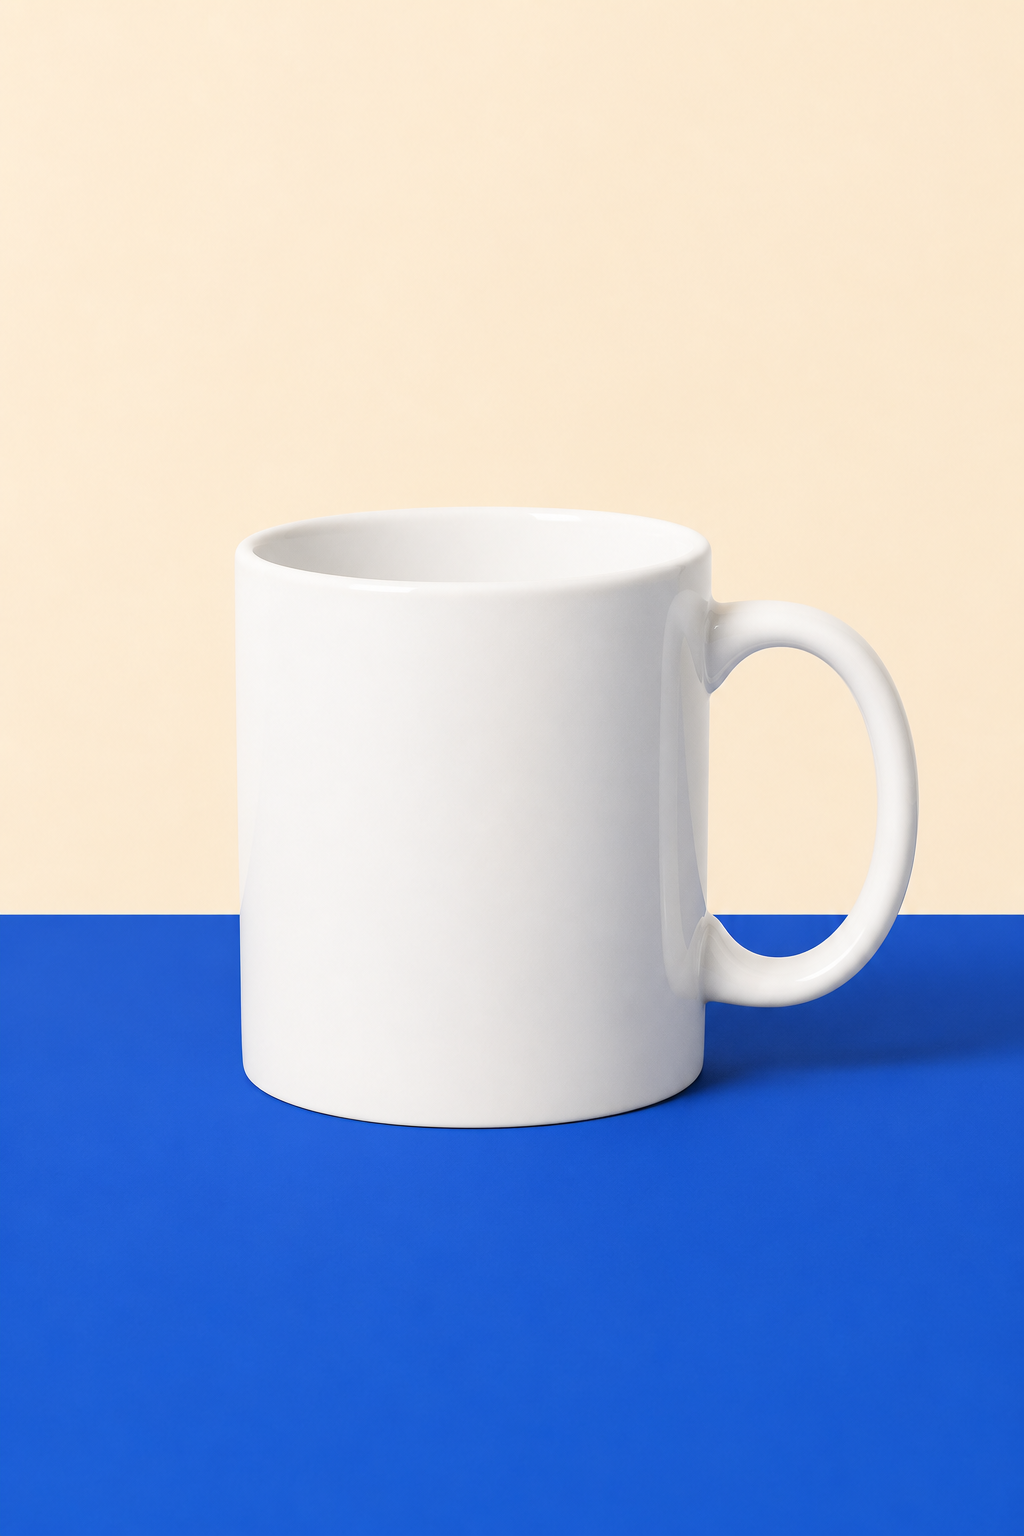
Original image:
curl https://api.qiyaov.com/openai/images/edits \
  -H "Authorization: Bearer 你的 API Key" \
  -H "Content-Type: application/json" \
  -d '{
    "model": "gpt-image-2",
    "image": "https://cdn.acedata.cloud/assets/examples/gpt-image/d56455e2-e7f7-4bcd-b935-475b0a1e0948_0-18240dc44b9c.png",
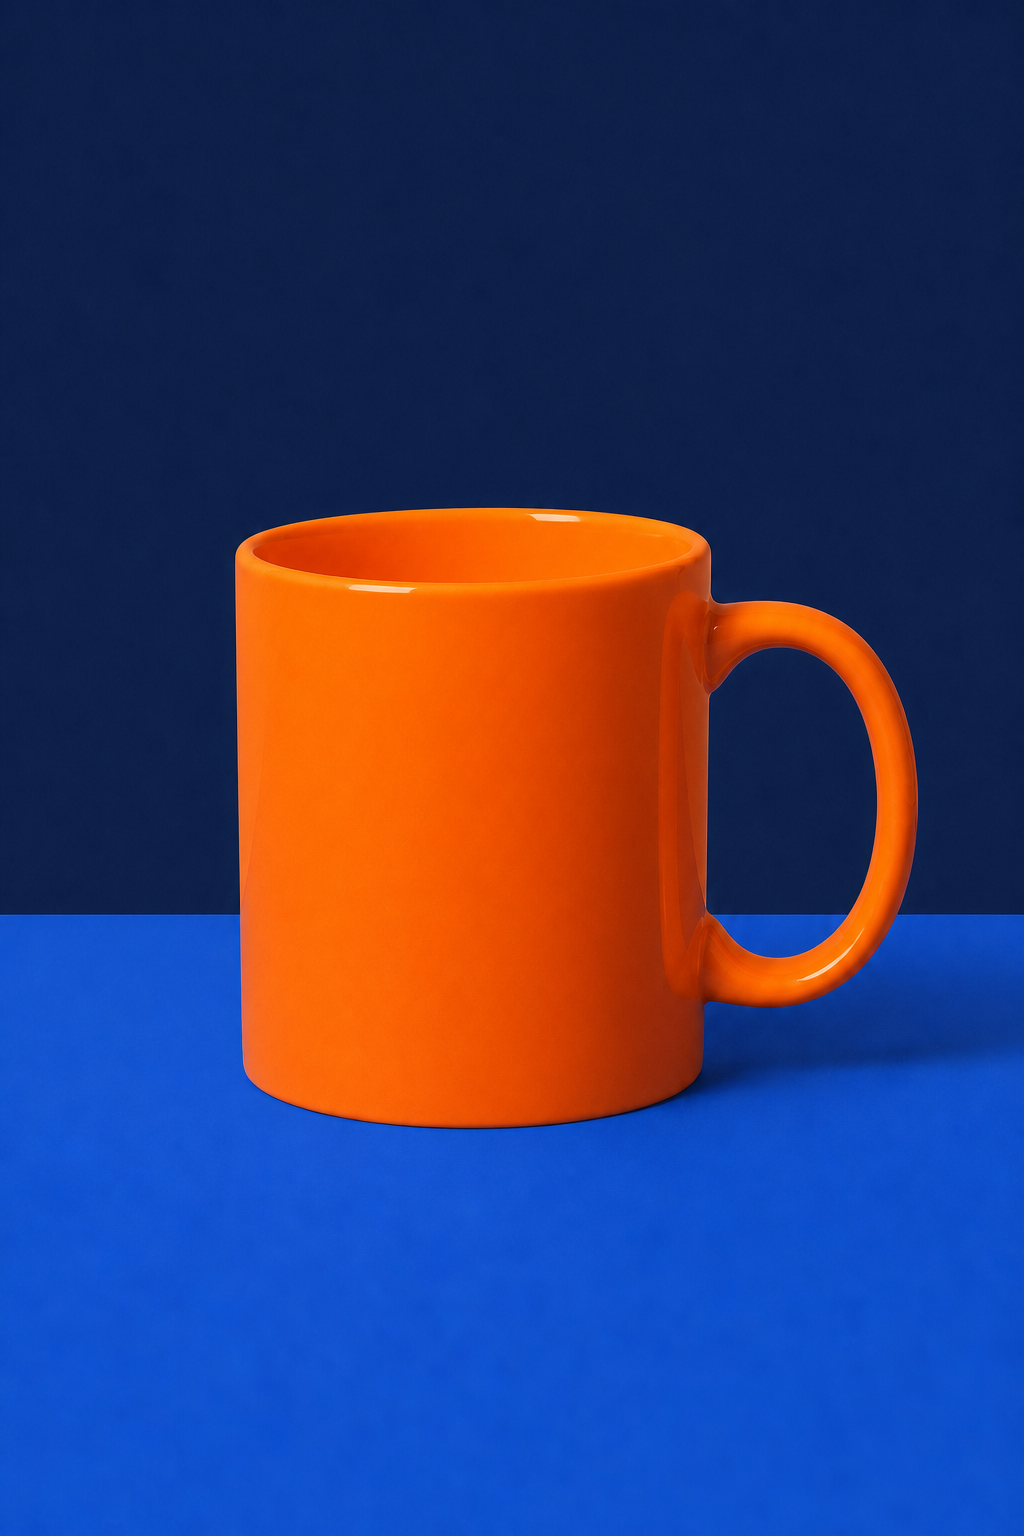
    "prompt": "Keep the mug, tabletop, camera angle, portrait layout, and soft shadow unchanged. Change only the mug color from white to vivid orange and the pale cream background to solid dark navy blue. No text and no logo.",
    "size": "1024x1536"
  }'
Successful response:
{
  "success": true,
  "task_id": "49848451-c624-4df9-9dc2-494018daaf4c",
  "trace_id": "5ac021c2-2891-4eed-bfcf-4c6668ac1be1",
  "created": 1788831893,
  "model": "gpt-image-2",
  "data": [
    {
      "url": "https://cdn.acedata.cloud/assets/examples/gpt-image/49848451-c624-4df9-9dc2-494018daaf4c_0-b6d780a732ca.png"
    }
  ],
  "usage": {
    "input_tokens": 775,
    "output_tokens": 1372,
    "total_tokens": 2147
  }
}
This is the editing result actually completed through qiyaov on September 8, 2026. The mug was changed to orange, the background to dark navy blue, while retaining the original composition and 1024×1536 dimensions:
¶ 3. Upload a Local Image
Use multipart/form-data:
curl https://api.qiyaov.com/openai/images/edits \
  -H "Authorization: Bearer 你的 API Key" \
  -F "model=gpt-image-2" \
  -F "image=@input.png" \
  -F "prompt=Replace the background with a bright modern studio"
You can pass image repeatedly. The GPT Image series supports up to 16 reference images. image in a JSON request can be a single URL or an array of URLs; local files are uploaded using multipart.
¶ Models and Billing Methods
| Model | Applicable Scenarios and Billing Methods |
|---|---|
gpt-image-2 |
Default reverse channel, fixed billing per successfully generated image |
gpt-image-2:reverse |
Explicitly select the reverse channel, fixed billing per successfully generated image |
gpt-image-2:official |
Official API channel, higher stability, billed by actual Token usage |
gpt-image-2.5-flare |
Focuses on generation speed, fixed billing per successfully generated image |
gpt-image-2.5-flare:official |
Official API channel, higher stability and focuses on generation speed, billed by actual Token usage |
gpt-image-2.5-sunburst |
Focuses on high fidelity and precise control, fixed billing per successfully generated image |
gpt-image-2.5-sunburst:official |
Official API channel, higher stability and focuses on high fidelity and precise control, billed by actual Token usage |
The displayed price for the official API channel is an estimate before the request; the final amount is based on the actual Token usage in the response and usage records.
¶ 4. Use a Mask for Local Editing
The official Images Edit endpoint uses mask to specify the area allowed to be modified. qiyaov's :official models follow the same multipart contract:
maskmust be a PNG with an Alpha channel and must not exceed 4MB;- The mask dimensions must exactly match the first
image; - Transparent pixels with an Alpha value of
0indicate areas allowed to be edited, while non-transparent pixels indicate areas that should be retained; - RGB images that are only black and white but have no transparency channel cannot be used as valid masks;
- The prompt should describe the complete desired image while clearly specifying the local modifications and the content that needs to remain unchanged.
First, generate a mask from the original image below. The example makes the central rectangle transparent, allowing the model to modify only that area:
from PIL import Image, ImageDraw

source = Image.open("input.png").convert("RGBA")
mask = Image.new("RGBA", source.size, (0, 0, 0, 255))
draw = ImageDraw.Draw(mask)
width, height = source.size
draw.rectangle(
    (width // 4, height // 4, width * 3 // 4, height * 3 // 4),
    fill=(0, 0, 0, 0),
)
mask.save("mask.png")
Then upload the original image and mask together:
curl https://api.qiyaov.com/openai/images/edits \
  -H "Authorization: Bearer 你的 API Key" \
  -F "model=gpt-image-2:official" \
  -F "image=@input.png" \
  -F "mask=@mask.png" \
  -F "prompt=Keep the composition, lighting, and all objects outside the transparent mask unchanged. Inside the masked area, replace the empty tabletop with a small blue ceramic vase."
You can also use the images.edit invocation method from the official OpenAI Python SDK; simply point base_url to qiyaov:
from openai import OpenAI

client = OpenAI(
    api_key="你的 API Key",
    base_url="https://api.qiyaov.com/openai",
)

with open("input.png", "rb") as image, open("mask.png", "rb") as mask:
    result = client.images.edit(
        model="gpt-image-2:official",
        image=image,
        mask=mask,
        prompt=(
            "Keep the composition, lighting, and all objects outside the "
            "transparent mask unchanged. Inside the masked area, replace "
            "the empty tabletop with a small blue ceramic vase."
        ),
    )

print(result.data[0].url)
When using mask, the original image and mask must be uploaded separately in the same multipart request through image=@input.png and mask=@mask.png. Do not pass a URL original image together with a local mask file; pure URL editing requests do not support adding a local mask file. The mask constrains the editing area, but the generation model may still naturally blend the edges; when strict boundaries are needed, use clear Alpha edges and repeatedly specify in the prompt which content must remain unchanged.
The invocation methods above are consistent with the mask examples in the OpenAI Image Edit API and the official GPT Image Cookbook.
¶ 5. Common Parameters
| Field | Description |
|---|---|
model |
gpt-image-2, gpt-image-2.5-flare (faster), or gpt-image-2.5-sunburst (higher fidelity and control); all three can select the corresponding :official variant, and gpt-image-2 also supports :reverse |
image |
JSON uses a single URL or an array of up to 16 URLs; multipart uses one or more image file fields. Local image files must be uploaded when using mask |
mask |
Optional PNG mask, multipart file upload only; must include an Alpha channel, be the same size as the first image, and not exceed 4MB |
prompt |
Editing instruction |
size |
auto or a compliant WIDTHxHEIGHT |
n |
1–10; only 1 is supported when response_format=b64_json |
response_format |
url or b64_json |
callback_url |
Optional asynchronous callback URL |
The size rules are consistent with the generation API: width and height must be multiples of 16, the longer side must not exceed 3840, total pixels must be 655,360–8,294,400, and the aspect ratio must not exceed 3:1. When size is omitted or auto is used, the model will select the canvas based on the prompt and the first reference image.
gpt-image-2, gpt-image-2.5-flare, gpt-image-2.5-sunburst, and gpt-image-2:reverse are billed by the number of successfully generated images; gpt-image-2:official, gpt-image-2.5-flare:official, and gpt-image-2.5-sunburst:official are billed based on the actual Tokens for text input, reference image input, and image output, with final usage records prevailing.
¶ 6. Asynchronous Callbacks and Troubleshooting
For long-running tasks, add the following to the request:
{
  "callback_url": "https://example.com/webhooks/images"
}
The asynchronous 200 response is {"task_id": "..."}; the final result is returned through a callback upon completion. Synchronous requests return created and data.
| Status | Check |
|---|---|
| 400 | Image format/quantity, parameter combinations, and size format; when using mask, check the PNG Alpha channel, 4MB limit, and whether its dimensions match the first original image |
| 401 | API Key and Bearer Header |
| 429 | Request frequency |
| 504 | Switch to asynchronous callbacks |
Error responses include trace_id. Provide this ID when reporting issues; do not provide the API Key.
For complete fields and real-time enumerations, refer to the OpenAI Images Edits API page. For generating images from plain text, see GPT Image 2 / 2.5 Image Generation.